


Table of contents
- Step 1 : Launch an EC2 instance and connect to it using SSH or using Instance Connect.
- Step 2: Clone the repository which is having our typescript app called 'Calculator'
- Step 3: Install the necessary dependencies and packages required for our app as shown below
- Step 4: Install serve tool
- Step 5: Allow port 3000 in inbound rules of the instance
- Step 6 : Check if app is running
- Deploying using Nginx
- Step 1 : Installing Nginx
- Step 2 : Add below server block in above configuration file.
- Step 3 : Check if app is running on the default port of Nginx (80)
Hello Everyone! I hope you are doing great 🙂. I will show you how to deploy a simple typescript calculator app using serve and Nginx. Let's get started.
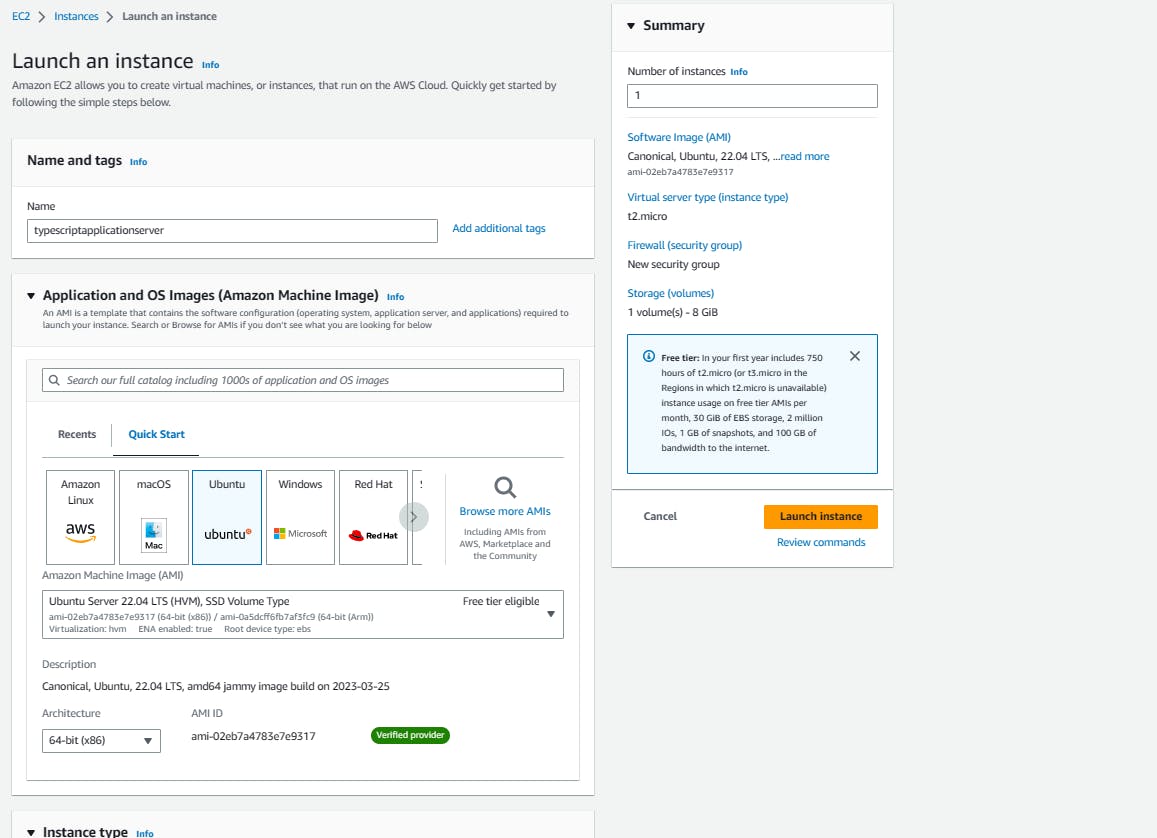
Step 1 : Launch an EC2 instance and connect to it using SSH or using Instance Connect.
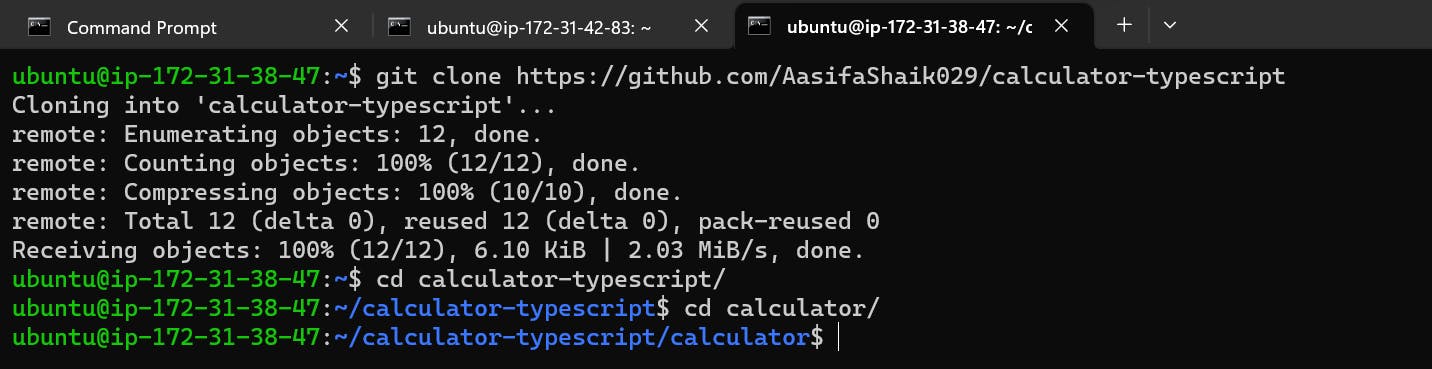
Step 2: Clone the repository which is having our typescript app called 'Calculator'
Github Repo: AasifaShaik029/calculator-typescript: This is a Calculator app (github.com)
Step 3: Install the necessary dependencies and packages required for our app as shown below
# This command updates the local package index of your system
sudo apt update


# This command installs the curl package
sudo apt install curl


# This is script for installation of NVM (Node Version Manager)
curl https://raw.githubusercontent.com/creationix/nvm/master/install.sh | bash


# This ensures that the NVM executable is added to the system's PATH, allowing you to use NVM commands
source ~/.profile

# This command uses NVM to install version 16.14.0 of Node.js.
nvm install 16.14.0

#This command installs the dependencies specified in the package.json file of our project
npm install

# This command installs the node-typescript package
sudo apt-get install node-typescript -y

# This command executes the "build" script defined in the package.json file of our project
npm run build

Here when we run the npm run build command one dist folder is created which contains the project's configuration and build process.
Step 4: Install serve tool
The serve command is a tool or utility that allows you to quickly set up a local development server to serve static files ( HTML, CSS , JS Files, image files etc ). It enables you to preview and test your web application or website locally before deploying it to a production server.
# This command installs the serve package globally on your system. The --global flag ensures that the package is installed globally rather than locally in the current project directory. This allows you to use the serve command from anywhere in your terminal

npm install --global serve

# This command uses the serve command to start a local server and serve the contents of the dist folder

serve -s dist
You can see that our app is running on the port 3000

Step 5: Allow port 3000 in inbound rules of the instance

Step 6 : Check if app is running
Check using the public IP address of the instance:3000 in the browser. You can see that our app is running and successfully deployed in the ec2 instance.


Now lets deploy using Nginx
Deploying using Nginx
Difference between serve and Nginx
Serve is a lightweight development server primarily used for local development and testing
Nginx is a powerful web server, reverse proxy server and load balancer. It is designed for production environments and can handle high-traffic loads.
Step 1 : Installing Nginx
# Installs Nginx server
 sudo apt-get install nginx -y

# This command opens the default configuration file for Nginx
 sudo nano /etc/nginx/sites-available/default
Step 2 : Add below server block in above configuration file.
Give your public IP address after server_name and give root directory of your app path after root
server {
listen 80 default_server;
listen [::]:80 default_server;

root /var/www/html;
index index.html index.htm index.nginx-debian.html;

server_name 43.205.208.255;

location / {

root /home/ubuntu/calculator-typescript/calculator/dist;
try_files $uri $uri/ /index.html;

}
}
Step 3: Restart the Nginx
sudo systemctl restart nginx
sudo systemctl status nginx

Step 3 : Check if app is running on the default port of Nginx (80)
Our Nginx server is running. Now lets check if app is deployed using it.

🥺 We are getting this error. Lets resolve this using below commands. Lets check the logs for it using
sudo tail -f /var/log/nginx/error.log

We need to give execution permissions to below directories.
chmod +x /home/
chmod +x /home/username
chmod +x /home/username/siteroot

------------------------------------

sudo chmod +x /home/
sudo chmod +x /home/ubuntu
sudo chmod +x /home/ubuntu/calculator-typescript/calculator
Now lets try again , refresh it

Our app is deployed using an Nginx server as well😇
🌿 Thank you for your time, Please follow for more articles on DevOps and Cloud 🌿